How to Build a Home Video Studio for under $350: A Step by Step Guide
I discovered the need for a private video studio so I built one in a small room I had in my apartment this summer. I also wanted to document the step-by-step process I took to accomplish this for under $350 (minus the camera, tripod, and mic — I already had those on hand).
When I first got into vlogging and started uploading videos to YouTube, it didn’t take me long to find out how bad the lighting was in most places and how noisy the world was! Rooms were too dark, the outdoors were too bright, AC units were noisy, and people can’t help but yell while you’re recording for some reason.
This wasn’t a huge problem if I was walking and talking to the camera or filming b-roll, but it was always a struggle to find a good place to record the quiet steady shots of a single person simply talking to the camera.
That’s when I discovered the need for a private video studio so I built one in a small room I had in my apartment this summer. I also wanted to document the step-by-step process I took to accomplish this for under $350 (minus the camera, tripod, and mic — I already had those on hand).
Here are the ten steps to building your DIY home video studio:
1. Plan Your Content
Before you get started with any of the other steps, it’s important to understand the future of this studio and that’s done with a content plan. If you already understand what kind of content you will be creating than skip this step.
The kind of content you create will drastically inform the type of studio you need. So, here is a list of questions to consider before you get started:
- What are all the possible videos you might want to shoot in this space?
- What time of day and how often do you plan on using this studio?
- Who might you invite into this studio?
- What camera angles will you need?
- How much space will you need for this studio?
- Who else may want to use this studio?
Different types of content will also inform the overall look and feel of the studio from the lighting, backdrop, and decor you pick out. And, while there isn’t a formula, most video content will fit within four major categories.
The Four N’s (ish) of Content:
- Inspire: These are videos meant to motivate, uplift, and arouse the viewers needs to do more, be more, and expect more. Videos in this category generally include inspirational stories (real or fictional), acts of heroism, rousing speeches, religious sermons, or recordings of people doing the impossible.
- Inform: Not all stories are inspirational, but we still like to hear them. Informative videos are often seen in news broadcasts and other journalistic endeavors. Documentaries videos also belong in this category.
- Empower: To empower your viewers to educate them. To show, explain, or teach them how to do something, think differently, or accomplish something they could not do before. Videos that fit into this are lectures, how-tos, demonstrations, and expert interviews.
- Entertain: This is the broadest category and the most difficult. These videos are meant to amuse and are for the viewer’s pure enjoyment and fun. Videos in this category are movies, most TV series, comedy skits, music videos, most vlogs, and many many more.
Naturally, these four categories can overlap but which categories do you think you will need the studio to help you make videos for?
As an example, I am sticking primarily to using my studio to inform and empower (educate). I just needed a quiet well list space that looked nice to teach others a wide variety of topics. That decision informed my more neutral backdrop and decore, and focused on just me and a laptop where I often have a keynote slide to cut to.
Think through all the types of content you will want to make to inform the rest of the decisions in the following nine steps.
2. Pick a Location
For most people, like myself, you may have already selected the one empty room you have to make a home video studio in. There are other options, however, that you might want to consider.
Different types of content will require different locations. Creating a food channel will likely require a studio in your kitchen while an auto mechanic will need to figure out how to build a studio in his garage. While those are some obvious situations, not all content will easily inform where you should record.
Before you select that empty room, consider the connotations of the other rooms of your home. You might want to figure out how to build a studio around them rather than build a studio from scratch.
- Livingroom: This room is personable. Its where you host friends and family to talk about what’s going on in your life and theirs. If you want your content to feel more personable or your content revolves around your life, family, or you just want it to feel more authentic, this may be a good room for your studio. For an example of this, check out Johnny and Iz Harris’ channels.
- Kitchen: Beyond cooking, the kitchen can be about hosting, dinner parties, and entertaining. If you are making content about any of those topics the kitchen could work. It could also work as a lab for science experiments, remodeling how-tos, home management, etiquette, cleaning, organizing how-tos, and unboxing videos (especially if they are focused on home goods). If you think about it, a lot of life happens in a kitchen.
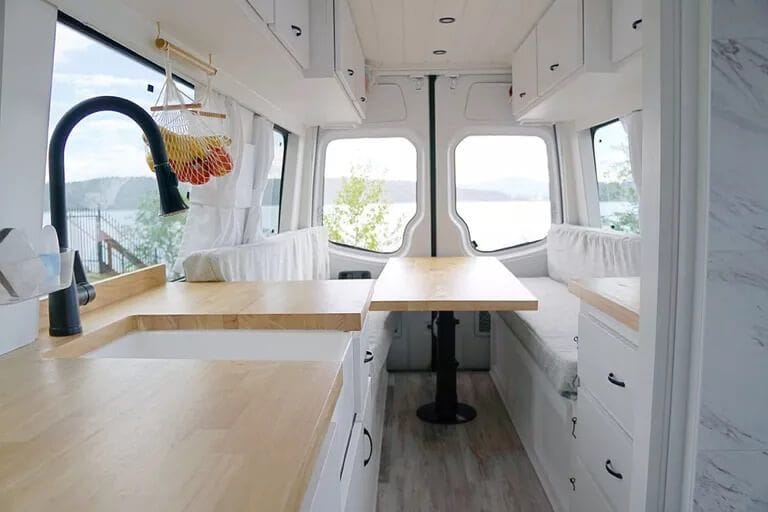
- Bedroom: No location is more intimate than in your bedroom. If your content is related to bedroom related activities, then it works. It might still work though if you are sharing very personal/vulnerable stories and want to leave your viewers like you are sharing it all. The bedroom can also be seen as youthful since so many teen vloggers only have their bedrooms to vlog in.
- Garage: This is the natural location for mechanics and craftsmen (woodworking, welding, etc) since this where their work happens. It’s also a great place for content that is more masculine, aggressive, or unrefined.
- Home office: If your content is more professional, career-oriented, or related to corporate America, the home office may be your best bet.
- Closet: This is an unlikely place, but it’s where I built mine so it’s worth mentioning. My back closet would have been defined as a small room if it had a window, however.
- Attic: I have to admit that I have not seen any videos shot in an attic. I could see a set design there that cover history, nostalgia, or anything related to the past or finding hidden treasures.
3. Paint the Walls
After you select a location, you may want to paint the walls. This is especially true if you want to use the room fully for media. So, here are a few use cases for different colors depending on if the location is used for multiple purposes or if it will become a dedicated studio.
Wall Colors for Dedicated Studio
Most videography or photography studios stick to white, black, or some shade of grey in between. When you may use a studio for a wide variety of content, you want neutral surroundings to keep unwanted colors from reflecting on your subject or background.
Here are some of the advantages of each of these colors:
- White: White is the most popular for studios as it allows the most light to bounce around the studio, making it easier to light your subject and background. White is also a popular interior color at the moment.
- Black: Black is popular for the exact opposite of white. It minimizes the amount of light that bounces off the walls onto your set so that you have full control of what is lit and what is not. I personally went with a flat black for my walls and backdrop, because I liked the “studio look” that a dark room provides.
- Grey: Many opt for some shade of grey to get some of the advantages of black and white. It’s said that 20% black (see image below) is the most neutral of all colors, so many video editors use this color to get the most accurate view of the colors on their monitor.
Wall Colors for Flexible Studios
For many, a home video studio is the secondary purpose of already functional space. It’s your living room, kitchen, bedroom, garage, etc. You may decide to change the whole decor of that room to fit a more studio aesthetic, but you don’t have to.
The existing colors and decor may already work. Ask yourself: Does it match your brand? Do the wall colors reflect who you are and what your content is about?
4. Select a Backdrop
Getting to your backdrop is the fun part and it may or may not have much to do with the wall colors you selected. If you are new to this, you may be asking then…
What is a video backdrop? A video backdrop is what is behind the main subject of your photo or video. Backdrops can range from pure black/white backgrounds to focus on the subject to elaborate sets to compliment the subject.
There are hundreds of options for backdrops, but I will focus on a few popular ones here.
- Infinity Backdrop: These are either well lit white backgrounds or dark black backgrounds that give the appearance of having no backdrop. They give the feeling that the background goes on into infinity. In more elaborate studios they sometimes have whole curved walls called infinity walls to give the illusion that a whole set goes on forever.
- Single Color Backdrop: This can be achieved by a paper roll or a painted wall and can be lit in different manors to create different gradients to add some more visual interest. Color is used in these backdrops to give a little more personality to your video background.
- Minimalist Set: Some colors have been chosen for background and a background object or two have been brought in to give some context to the video or add visual interest. It may be as simple as a bookshelf and a painting or just a bookshelf with a few well-chosen knick nacks. In my studio I use a simple black wall with two pendant lights I bought from IKEA.
- Functional Set: This is a functional room that is intentionally decorated for functional living and video recording. It’s a compromise of the two worlds. This is the most popular choice for YouTubers who vlog from home.
- Studio Set Design: This is a dedicated studio with a set designed fully from scratch and requires it’s own heading below to go into detail.
5. Design a Set
If you want to move beyond a simple backdrop or functional set, you can go all out and decorate your own set solely for your videos. Many of you may want to skip this step if you found something suitable.
To build a set, it helps to break down the set into two sections: The foreground and the background. Designing the set in two dimensions gives it some depth and allows you to think about the objects with a different viewpoint.
Set Background
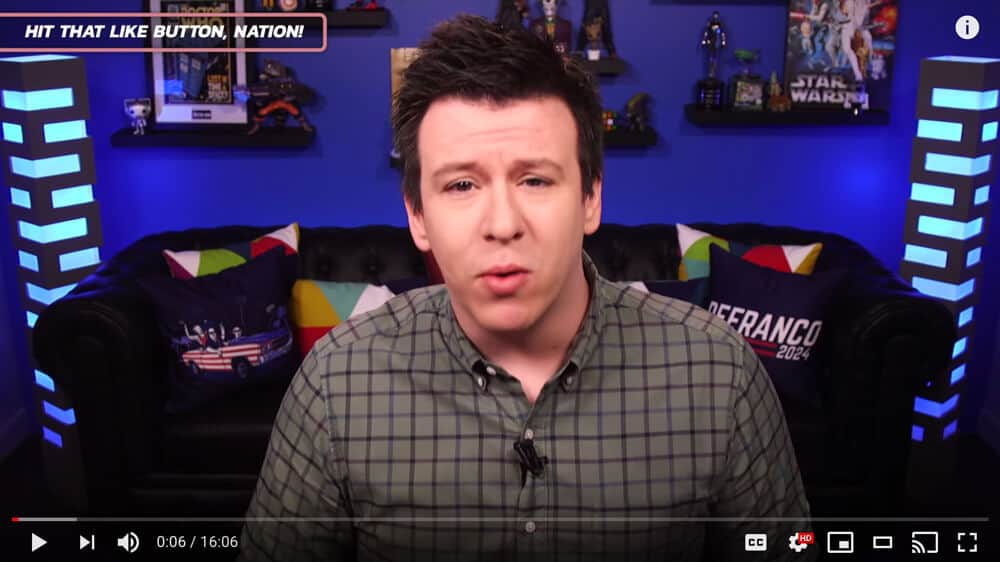
This is the backdrop to the set. It can be as busy as Philip Defranco’s set design below.
A background set can also be simple with just a bookshelf and an armchair. The important thing is to try to choose items, colors, and furniture that reflect your brand or give your videos some context of what the topic or overall theme of your videos are about.
It’s also important to black the background far enough back to create that feeling of depth in your videos.
Set Foreground
The foreground is all the items that are as close to the camera as the subject. It is often as simple as a table but can include objects that are being discussed in the video or objects that are in every video. Some times the set as simple as a fancy chair the subject is sitting in like in Amy Landino’s videos:
For my studio, I used a plain white desk and used a stool so no chair would be seen. I often have my laptop with me as the only other object in the foreground since I am often cutting to a keynote or some other visual on my computer screen while I discuss a topic.
6. Buy a Camera & Lens
There are hundreds of camera’s to choose from and many of them will work great. There is a lot you could consider when purchasing a camera and I will be writing a full post in the future to outline all those considerations.
Here is a brief list of considerations for a studio camera:
- Sensor Quality: In a studio, good low light performance helps.
- Lens selection: are there a lot of lenses available for this camera at different price points?
- Color Profile: How good does the image look right out of the camera.
- Auto Focus: If you are filming yourself frequently, the autofocus needs to work well.
- Flip Out Screen: This makes it easier to film yourself
- Easy of use: If you are new to video production, getting a camera that is more intuitive is helpful.
- Image Output: Having the option to go to 4k is nice to have.
7. Select Camera Accessories
Other than lights and a microphone (covered in separate steps) the only other piece of gear that is essential is the camera tripod. Most tripods will work fine for a studio, but if you are going to be traveling often with your tripod, I do recommend getting a travel tripod that can fold down to a more reasonable size.
I use a TYCKA Ranger travel tripod in my studio that I can easily strap on to my camera bag and take with me anywhere. If it’s only being used in the studio, a cheap Amazon Basics Tripod will work just as well. It really only needs to hold the camera still.
Other accessories to make your life easier:
- Video Monitor: This is a separate larger screen that your camera can feed into to give you a better idea of what the camera is recording. I mount a cheap 7″ Neewer Monitor screen on top of my camera to see myself when I am recording. That way I don’t have to wonder what is in frame or not.
- Camera Remote: If you are recording yourself this simple remote to start and stop recording can save you time going back and forth repeatedly between your camera and your set.
- Separate Audio Recorder: I record directly into my camera with a lavalier mic, but there you create a good redundancy by recording to a separate device in addition to your camera in case the audio feed or mic fails with one or the other.
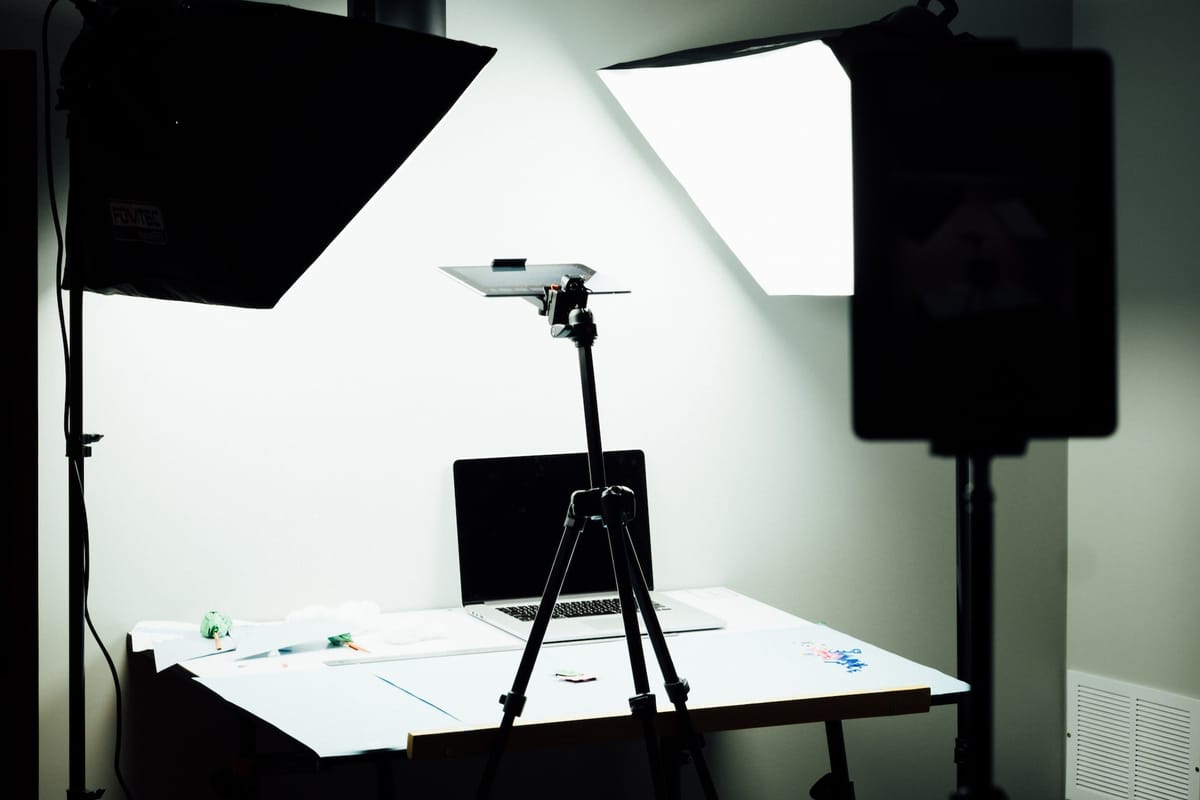
8. Set up Lighting
Lighting is often the thing that makes a studio a studio. This one element is the thing that will transform your video production more than anything else. Luckily, you can start with some pretty affordable solutions and build on top of that. You can never have enough light equipment.
Tungsten or Daylight Balanced Light?
A professional cinematographer would scoff at this question. They would say it depends on the situation—and they would be right. If you are building your first home video studio though, you will likely only be able to buy one light set and never care to get another.
So, let me make it easy for you. Choose a daylight balanced light kit if you can’t afford one that does both or if you can’t buy extra bulbs to have both on hand.
More and more videographers are using daylight-balanced lights as it becomes more affordable to do so. The benefit of daylight-balanced is that they are more neutral, allowing other colors (other than the yellow-orange that emanates from tungsten lights) to show through properly.
There are advantages to tungsten, but that is a post for another day.
Light Positions
Most studios would benefit from a simple three-point lighting set up to start. That means having your brightest light (key light) about 30 degrees to the side form your subject, having the second brightest light (fill light) on the other side 30-60 degrees on the opposite side, and having one small. but bright, hair light pointing down from the back.
In the photo below you can see that I use two cheap DIY lights on both sides and throw in an extra small light on one side to push the brightness up enough to be the key light.
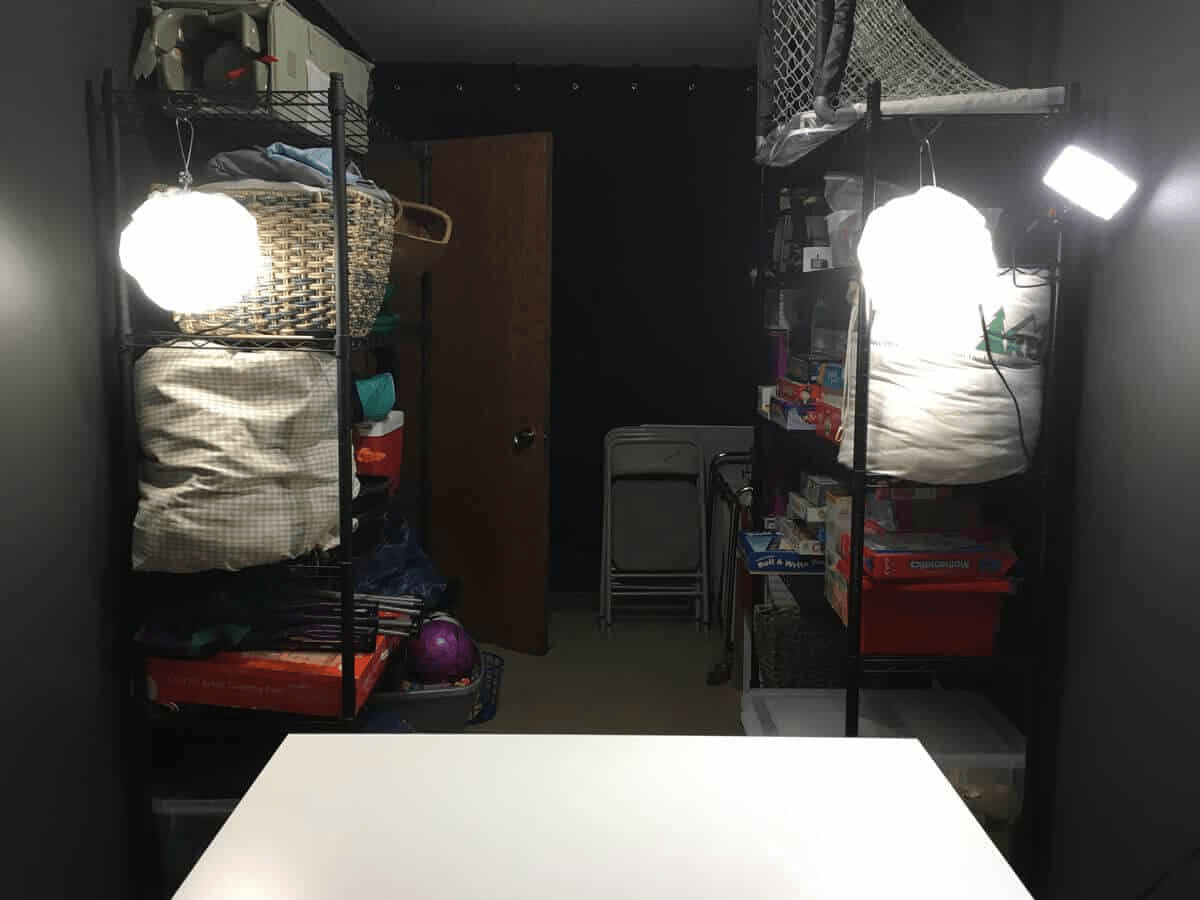
Two of the lights clamp on to the storage racks I have on the other half of my crazy long closet. What you can’t see in this picture is the one highlight I have hanging from the ceiling pointing down at the desk.
9. Set up a Microphone
After the lighting is figured out, being able to control your audio is the next major advantage of having a studio and having a good microphone setup is half the battle.
There is not a “right” way to set up a studio microphone, but some options are better than others. Here are the various microphone setups and my recommendation:
- On-Camera Shotgun Mic: This is the easiest solution if you already possess a mic that attaches to your camera’s hot shoe mount. It can be a strong option too if your camera is less than 5 feet away from your subject and the room does not have unwanted reverb, echo, or undesirable sounds.
- Lapel (lavalier) Mic: A lapel mic is a small mic on a wire that runs up your shirt and clips onto your collar. It is the easiest way to get the mic close to your mouth and does a great job in isolating unwanted sounds. It is what I use in my studio and what I recommend for most home studios.
- Boom Mic: A boom mic is generally a shotgun microphone at the end of a boom pole. The main advantage is the ability to position that pole as close as possible to your subject while keeping it out of frame. This allows you to get the most ideal sound with a high-quality microphone.
- Hand-held Mic: I’ve noticed that many studios will have a handheld mic in the frame on a table stand or table clamp with an adjustable arm. Theses are mostly podcasters and video game commentators but it is a viable option if you don’t mind a large microphone in the frame.
10. Adjust Room Acoustics
The last and final step of building a home video studio is adjusting the acoustics of a room to eliminate unwanted reverb, echo, or unwanted external sounds. This is the most difficult part of building a home video studio in my opinion and it can be hard to figure out why a room does not sound great.
There are generally two types of acoustic issues you are trying to fix in a room, so I will offer some solutions that have worked for me for both.
Reducing Exterior Noise – Sound Proofing
This may be the next-door neighbor’s dog barking, your children playing in the next room, or the air conditioning vent. To address these, we are getting into the world of soundproofing and there are a few simple things that can be done to help (at least a little).
- Sealing Cracks: Wherever air can travel, sound can travel with it. Use weather sealing strips from Home Depot to seal your windows and doors (even the interior doors). They also make door sweeps for underneath your door to keep the cold out of the exterior doors but they work great for soundproofing interior doors as well.
- Add Mass to Your Door: You might want to consider replacing your door with a solid door if most of the unwanted sound is coming from the inside hallway.
- Soundproofing Curtains: They make curtains designed to reduce sound coming through your windows. You can also hang acoustic blankets or a moving blanket over the windows as well.
- Seal Vents: If the air conditioning vent is causing problems, you might consider sealing it permanently with drywall, foam, or hanging a small acoustic blanket over it to at least reduce the noise.
There are steps that can be taken to fully soundproof a room, but that is a major construction project likely not worth the time.
Eliminating Reverb/Echo – Sound Dampening
This is the most common in rooms that are empty, small, or without carpet for flooring. Regardless, there are some simple steps that can be taken to reduce that unwanted reverb/echo.
Here are a few things you can do to dampen the unwanted sound.
- Rugs: If you don’t have carpet, throw down a large rug. The thicker the better.
- Add More Furniture: An empty room gives more flat surfaces for the sound to bounce around. Adding more stuff into the room will break up those sounds to make it sound more natural. Bookshelves in particular with all those different shaped and sized books work great.
- Hang Sound Panels: You can purchase sound panels that are designed to absorb sound. They even come in different colors to match your set.
- Hang Acoustic Foam: If the sound panels cost too much, acoustic foam can work as well to cover parts or all of a wall to absorb sound. Be warned though, the quality of the foam matters. I started with cheap foam and found it lacking immensely.
- Hang Up Acoustic Blankets: They have blankets designed for absorbing sound that you can hang on a wall or in the middle of a room to block sound. I did find that moving blankets worked almost as well for my studio and cost a fraction of the price.